System Operations and Money Movement
Holiday Configuration
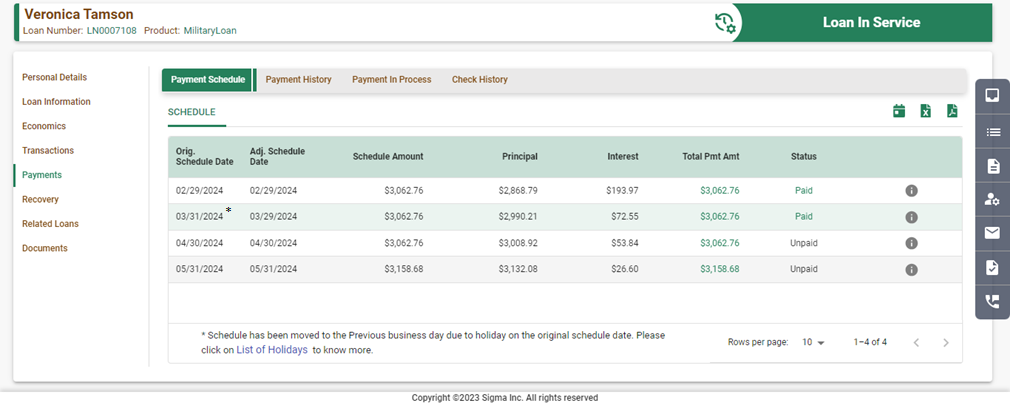
Once a loan is onboarded into the Loan Servicing System, an amortization schedule is automatically generated to outline the expected payment dates for the loan under a perfect payment scenario. This schedule is ideal for instantaneous payments. However, for payment methods such as ACH or EFT, payments can only be received from the borrower’s bank account on business days.
If a payment due date falls on a holiday, the system allows for flexibility in handling such scenarios. Specifically, payments can be scheduled to be pulled either on a business day immediately before or after the Original Schedule Date. LendFoundry provides tenants with the option to configure this setting according to their preference as part of the product set-up.
On the user interface, the loan repayment schedule displays two important date fields: “Orig. Schedule Date” and “Adj. Schedule Date.” The “Orig. Schedule Date” represents the original due date for the payment. In contrast, the “Adj. Schedule Date” indicates the Date to which the Schedule Date was adjusted to account for the Holiday, in case the original due date coincides with a holiday. This adjustment ensures that payments are processed smoothly while accommodating non-business days.
Previous Holiday Configuration for Interest-bearing loans
Adjusting the Schedule Date to Before the Original Due Date in case of a Holiday: If a tenant chooses to adjust the Schedule Date to the business Day prior to the Original Schedule Date, they can utilize the “Previous” holiday configuration. Under this configuration, if the original due date falls on a holiday, then the split of the payment Amount for that particular schedule is as per the interest accrued till the Adjusted Schedule Date.
Impact on Amortization.
Since the Schedule Date is adjusted to the previous business day, the split between principal and interest gets adjusted based on what is due on the Adjusted Schedule Date. This means that the interest portion will be reduced because the accrual is run for less number of day(s) and thus, the principal portion will be increased, reflecting the revised amortized schedule corresponding to that day and future schedule(s) as well.
Impact on DPD Days.
In the “Previous” holiday configuration, the DPD (Days Past Due) counter starts from the Original Schedule Date. This gives a buffer to the borrower to make their payment between the adjusted and original dates if their payment failed.
DPD Start Date Reference - “Original Schedule Date”
Next Holiday Configuration for Interest-bearing loans
Adjusting the Schedule Date to the next Business Day of the Original Due Date in case of a Holiday: If a tenant chooses to adjust the Schedule Date to the next Business Day after the Original Schedule Date, they can utilize the “Next” holiday configuration. Under this configuration, even if the original due date falls on a holiday, the split of the payment Amount for that particular schedule is as per the interest due on the Original Schedule Date only.
Impact on Amortization
In the Next Holiday configuration, the Schedule Date is adjusted to the next business day in case the Original Schedule Date falls on a holiday. However, the split remains as per the Original Schedule Date only.
Impact on DPD Days
In the “Next” Holiday Configuration, the DPD (Days Past Due) counter starts from the Adjusted Schedule Date, and not the Original Schedule Date.
DPD Start Date Reference - “Adjusted Schedule Date”
Impact on Amortization for MCA
Since the Schedule Date is adjusted to the previous business day or next business day due to holiday on the original schedule date(Previous holiday/next holiday configuration respectively), the adjusted schedule date will be on the previous business day/next business day. However as it is MCA loans so no changes in the amortization calculation (split in Principal and Finance Charge remains the same), instead it shifts the original payment schedule date to previous business day/next business day according to the holiday configuration. If any ad-hoc holiday is added post onboarding, the Maturity date will change.
Calendar Update
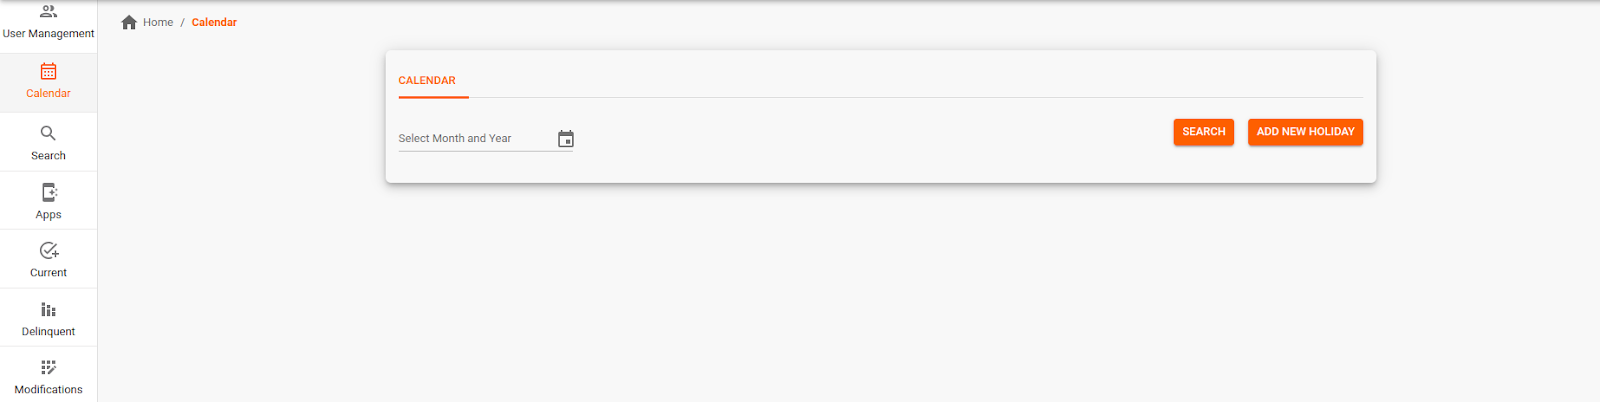
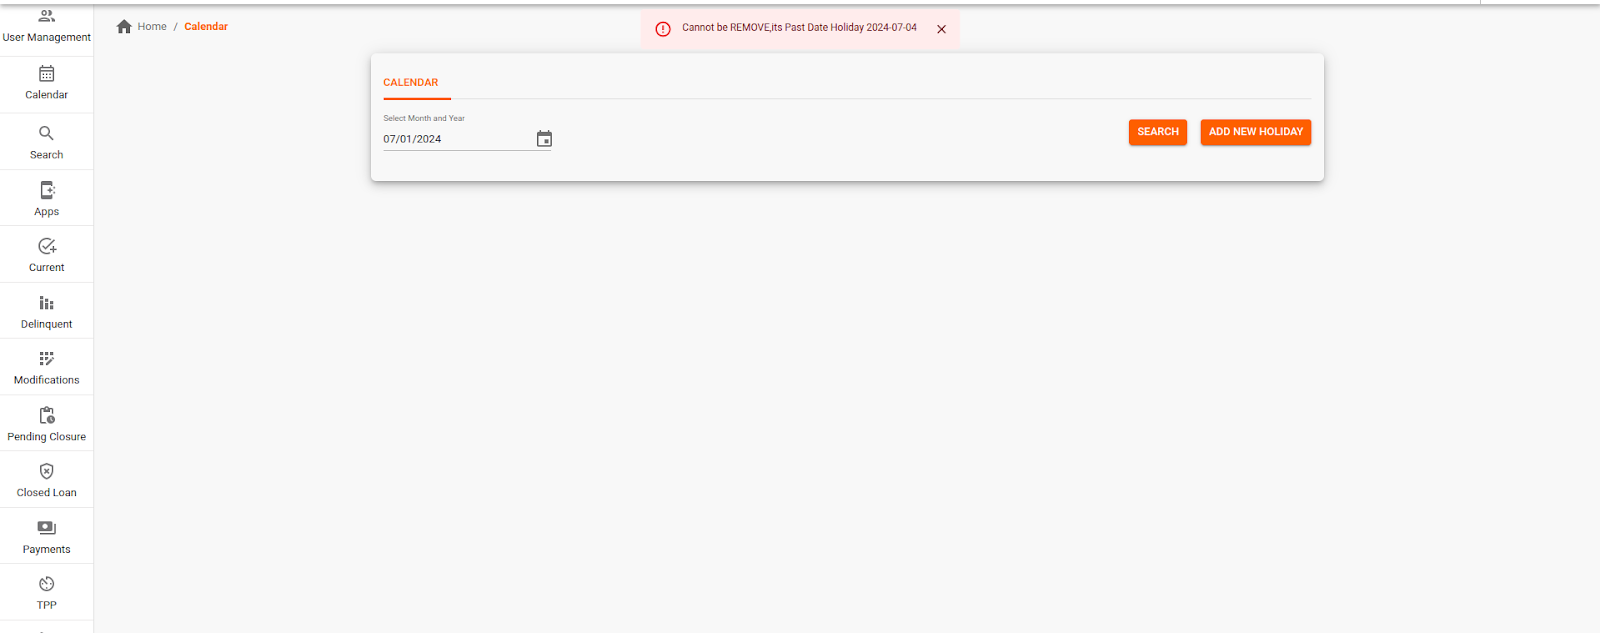
Using the below option on the left pane, the back-office user can see the list of holidays. He can also add a new holiday or remove any existing one. Any change to the holiday calendar will update the repayment schedules of existing loans at the end of the day. Also, any loans that are onboarded after this change, will have schedules considering this change.
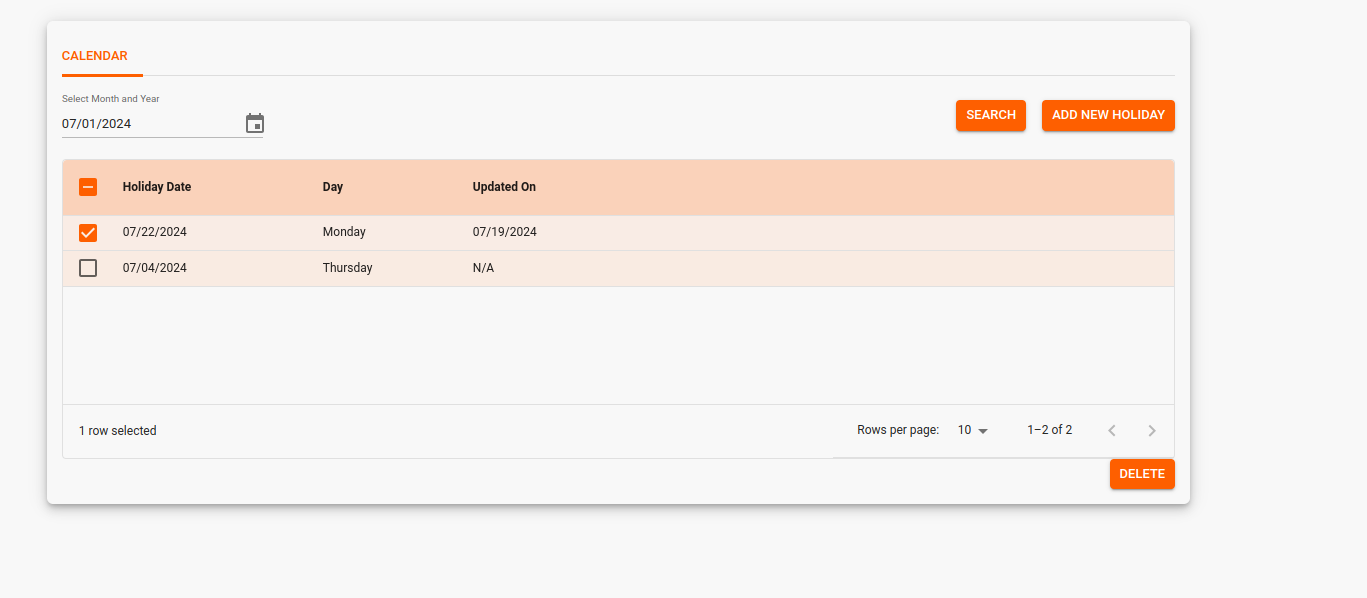
Search for Holidays
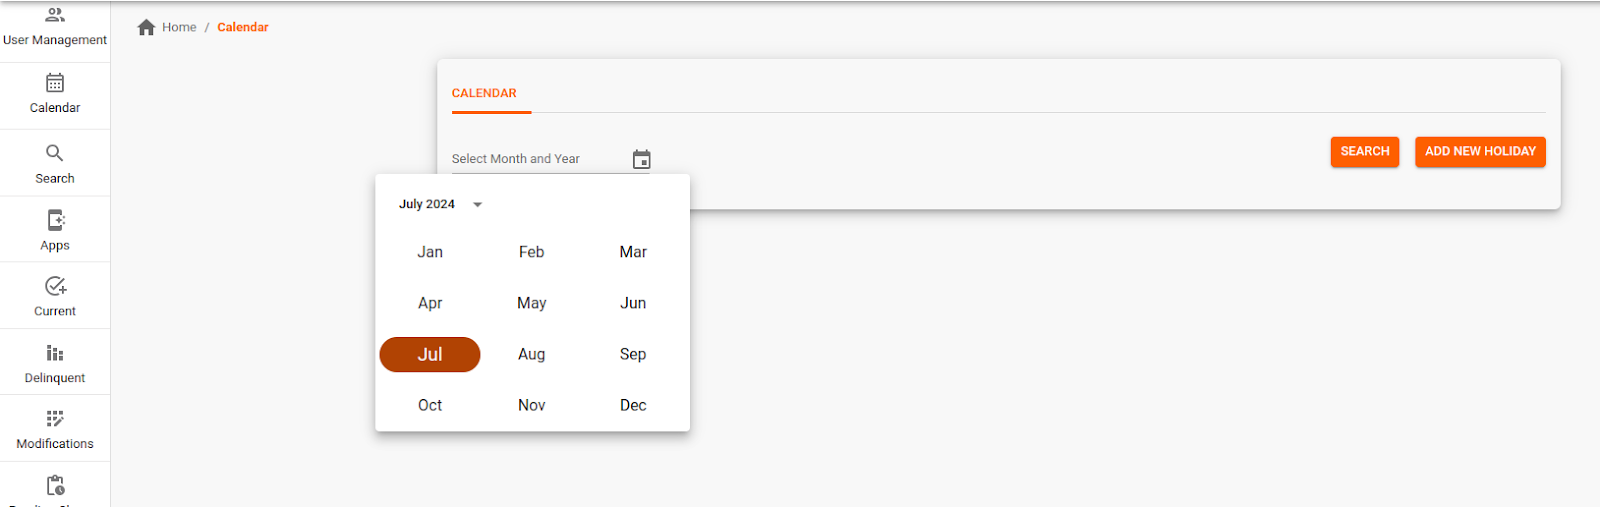
Select the month and year to search for the holidays (the date by default is considered as 1st of the month), and the system will populate the list of holidays with Date, Day, and Updated On. For the holidays already configured will show the date as N/A.

Add a new Holiday
Users can use the “Add New Holiday” button to add new holidays.
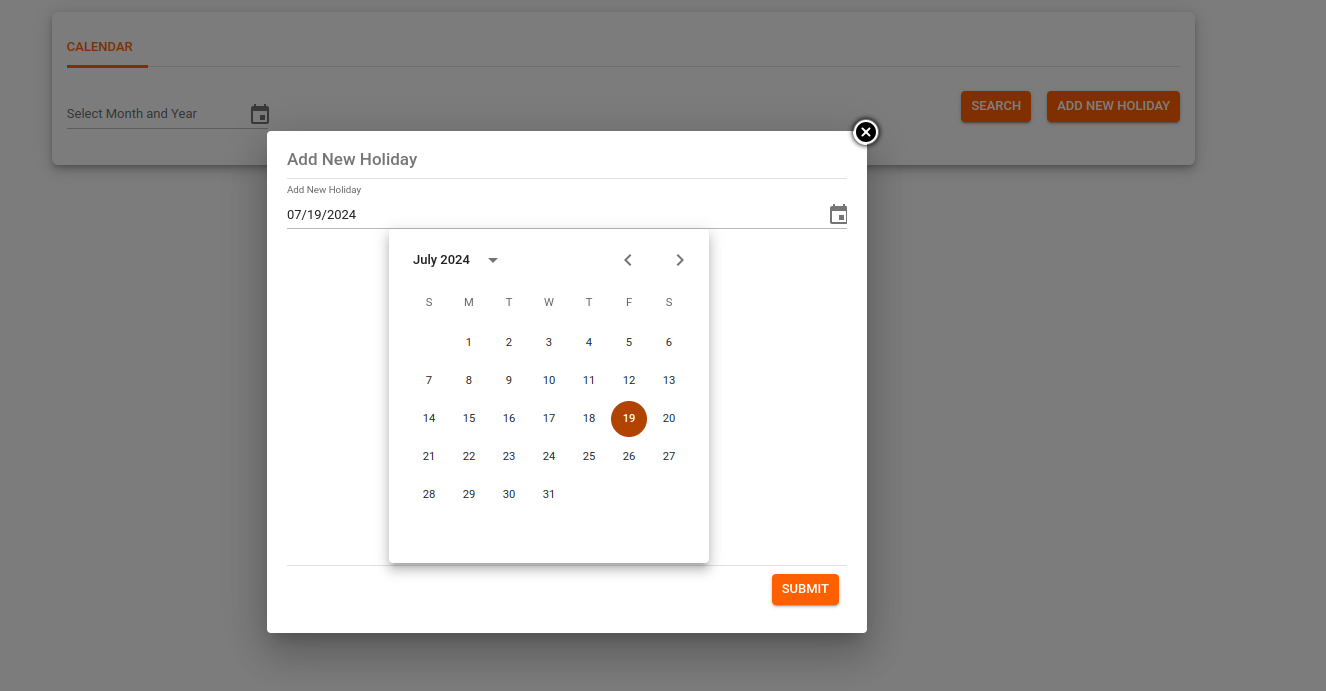
Some of the validation while adding holidays are:
-
A holiday cannot be added retrospectively. Only a future date can be added as a holiday.

-
A holiday cannot be added on days falling on the weekend.
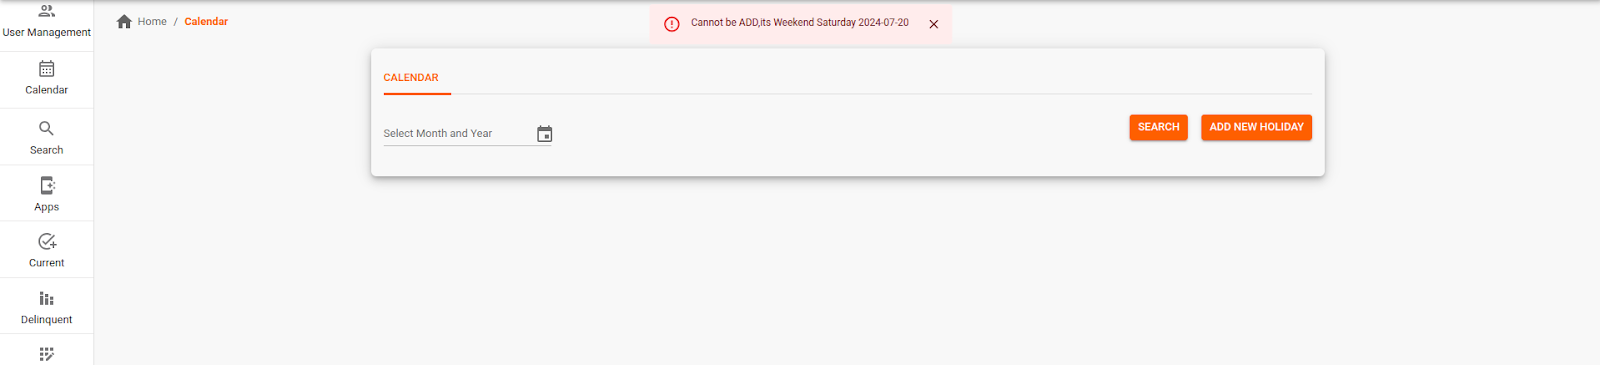
-
Any existing holiday cannot be added again.
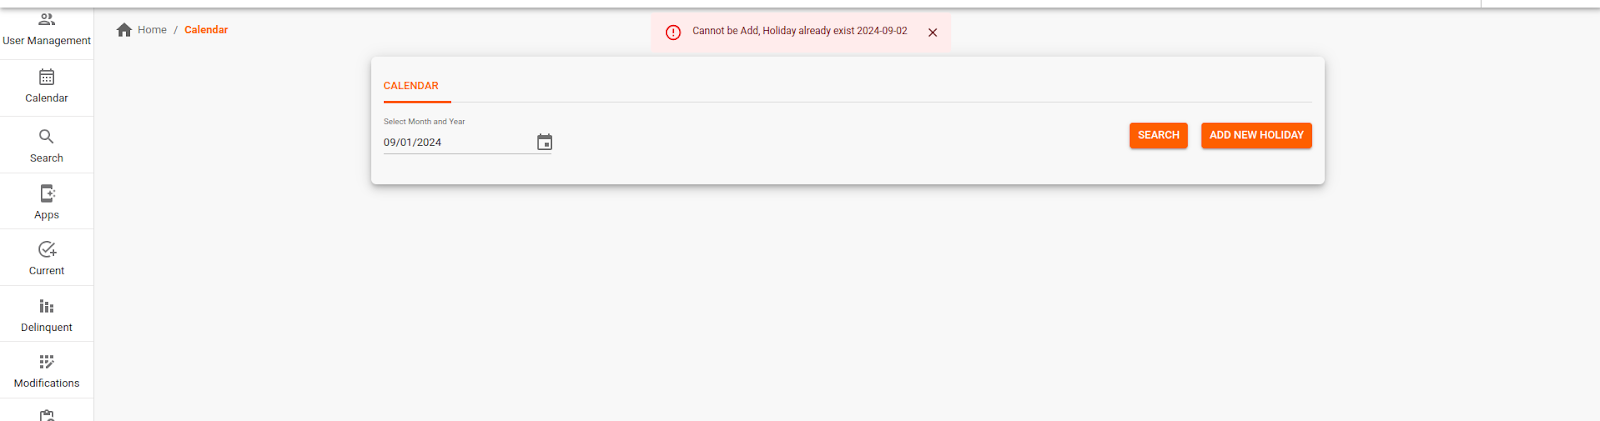
Once the holiday is successfully added the system gives a success message: “Holiday Added Successfully”. These new holidays will be listed in particular Month and Year with an updated date.


Remove a Holiday
Once the user wants to remove the added/configured holiday from the list, they can tick the checkbox of the holiday that needs to be removed and click on the “Delete” button. It will get deleted by giving a success message “Holiday Removed Successfully”.

The removed holiday will be greyed out as shown below.
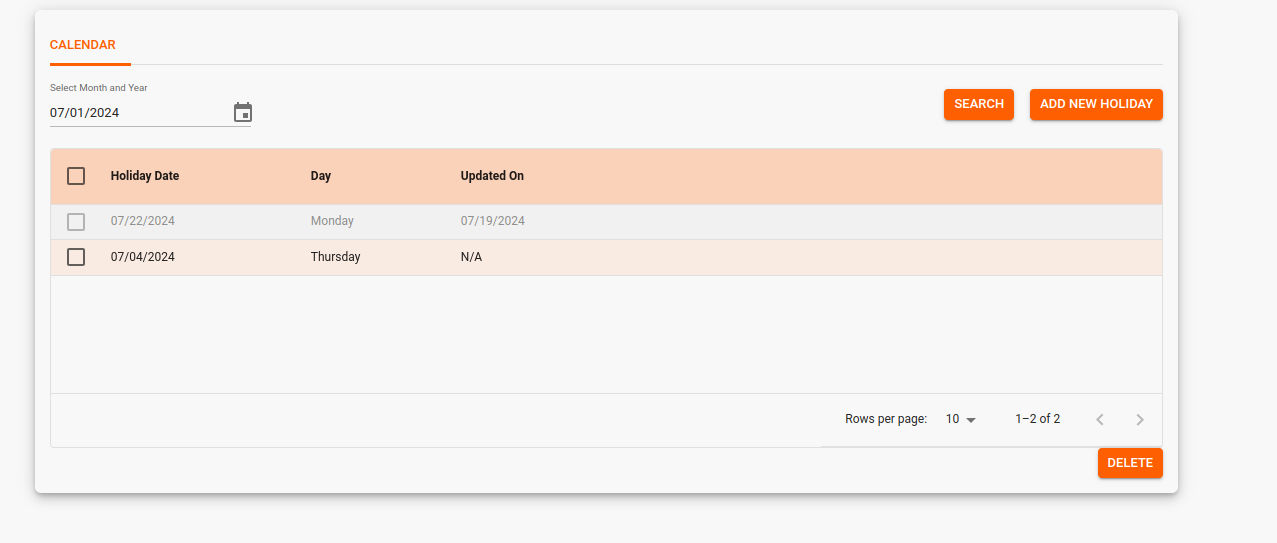
Only an existing holiday for a future date can be removed.
Holiday Change in “Next” holiday config
If a new holiday is added manually and it coincides with a Payment Due Date (i.e. the Original Schedule Date), the Schedule Date is shifted (adjusted) to the next business day in the “Next” Holiday configuration.
Example:-
- Original Schedule Date: Monday, 30th September 2024
Now, if a new holiday is added for Monday, 30th September 2024, the Schedule Date is shifted to the next business Day, i.e. Tuesday, 1st October 2024. Since there is no change in splits, the loan in this case doesn’t get amortized.
Holiday Change in “Previous” holiday config
If a new holiday is added manually and it coincides with a Payment Due Date (i.e. the Original Schedule Date), the Schedule Date is shifted (adjusted) to the next business day in the “Next” Holiday configuration.
Example:-
- Original Schedule Date: Monday, 30th September 2024
Now, if a new holiday is added for Monday, 30th September 2024, the Schedule Date is shifted to the next business Day, i.e. Tuesday, 1st October 2024. Since there is no change in splits, the loan in this case doesn’t get amortized.
Different Accounts for Repayments and Disbursement
At Borrower level
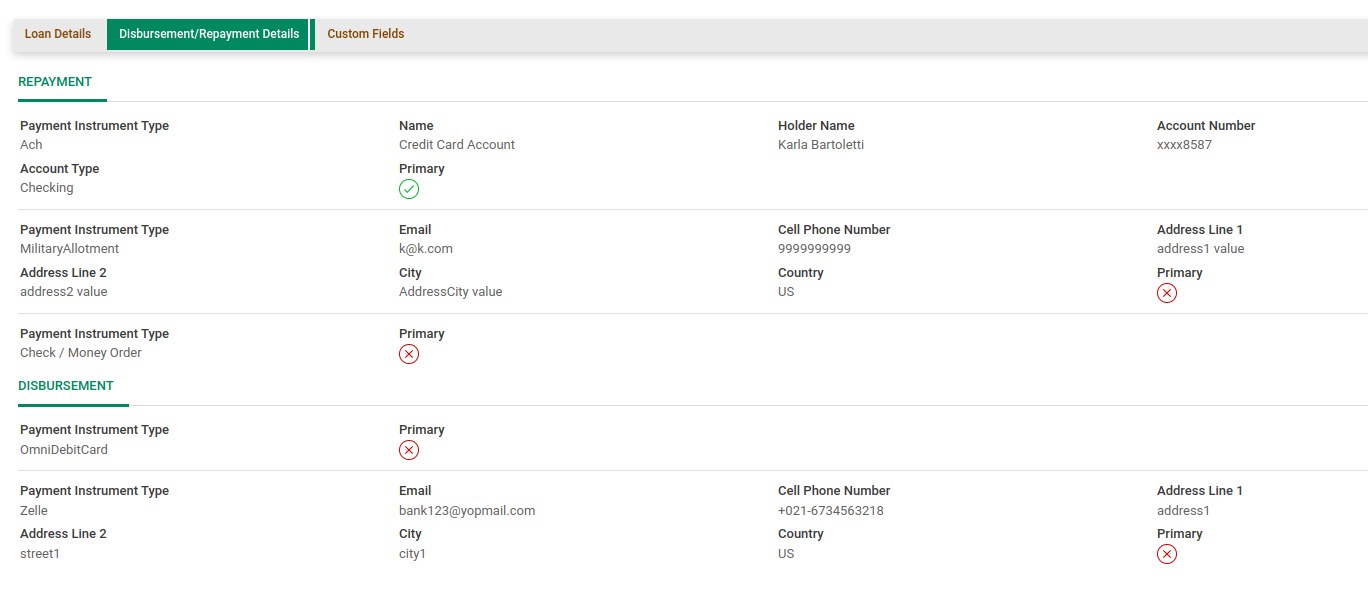
The borrower can choose to have different accounts for repayments and disbursement. In such a case, the lender can pass different accounts during onboarding of the loan to LMS. There is a field “Account Category” at the instrument level in the onboarding API which can be set to “Repayments” or “Disbursement” as required. Once the loan is onboarded, these details are visible on the loan view page in the Loan Information -> Disbursement/Repayment Details sub-tab as shown in the below image. Here, the instruments are grouped by the Account Category. And if under the same category, we have multiple instruments, those are separated by thin lines as shown below. At any time in the life of the loan, the repayment instrument can be updated using the “Update Payment Instrument/Bank Details” action menu.
At Lender level
The lender can also choose to have multiple accounts for disbursing the funds and for collecting repayments. In such a case, different accounts can be set up in the LMS configuration during the tenant set-up.
Money Movement
The LF system can create the disbursement(loans where auto-funded is ON) or repayment file(loan where auto-pay is ON) in the following ways:
Generate ACH file in prescribed ACH format
LF has the ability to automatically handle the creation of ACH instruction, using standard ACH format; other formats can also be created upon request as a custom service. However, these need to be transmitted using a partner bank, typically the lender’s banker. Instructions can be created for a credit or debit transaction, meaning can be used to send money or receive money for a loan. When an instruction is created it is put on the bank’s SFTP location, which the bank then reads and initiates payments.
Generate Debit card file in prescribed format
LF has the ability to automatically handle the creation of future debit card payments, which need to be transmitted using a payment service provider, typically selected by the lender. For each loan, where we have a registered debit card as a primary instrument, we are able to create batch files in the prescribed format. When a tenant has an LF LOS and LF LMS, the intake of a tokenized debit card is handled exclusively in the LOS at this time. If a debit card provider is not configured then this option needs to be disabled in the UI.
Flat file
When there is no direct integration with the lender’s bank, LF can create a file which lists all loans for which money is to be sent or collected (funding or repayments). There is a separate file generated for disbursement and a separate file created for re-payments. The repayment file will help the tenant keep a track of how many loans were expecting a payment on a given day and how many loans get funded in terms of volume and value. This file is an excel file and can be made available to the tenant on the shared SFTP location.
Bulk Payment
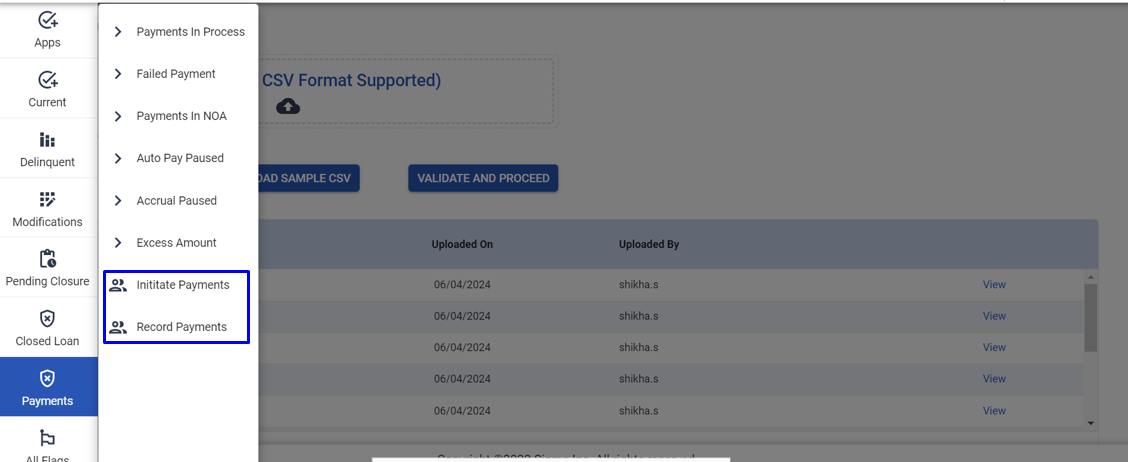
This feature allows tenants to upload the bulk payment file for the following use cases:
- Initiate Payments (Pull and process payments and send them to the payment provider for processing)
- Record Payments (Record the payments that have already happened outside of the system)
Users can choose the above through the Payments Filter(shown below). Users can also access the sample file using the “DOWNLOAD SAMPLE CSV” button. Once the file is uploaded, it has to be validated using the “VALIDATE AND PROCEED” button.
If the upload file has incorrect data, the system shows the validation message and generates an Error file which mentions all the errors related to the uploaded file. It also shows all the history for the uploaded files.
Payments can be added retrospectively, with a “Cash” Payment Instrument or any instrument that’s configured for you and using the following payment hierarchies - Schedule, Default, and Custom.
In all other hierarchies, only the payment amount is required and the split of the amount happens automatically according to the hierarchy but in Custom the user needs to provide the split also which when added should be equal to the payment amount.
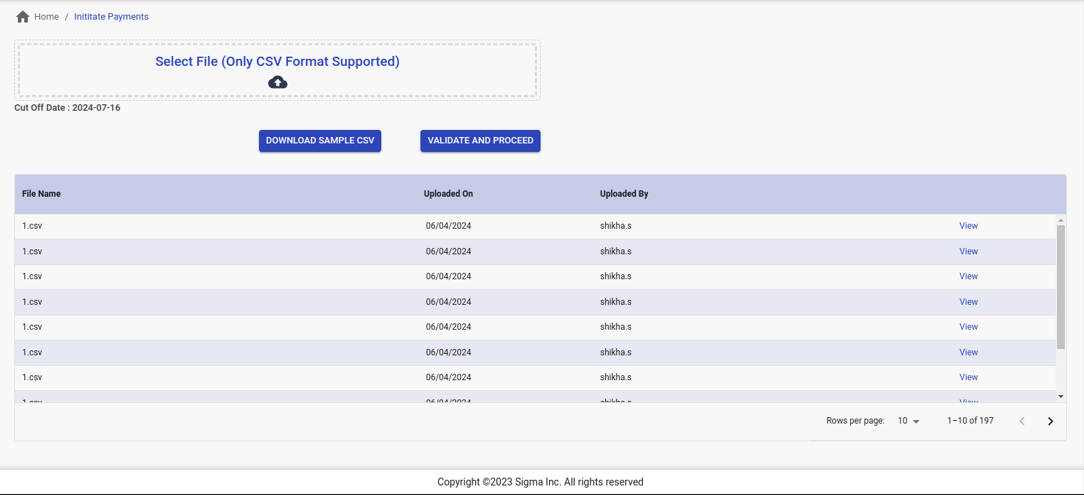
The file can include record(s) to initiate a payment as well. The system supports auto-pay instruments such as ACH, debit cards, EFT etc(as per the tenant configured instrument) for initiating payments. Payment should be initiated after the “Cut Off Date” for creating payment files. Please see the screenshot below. Once the file starts processing, the status of the payment is shown as below for each of the record(s).
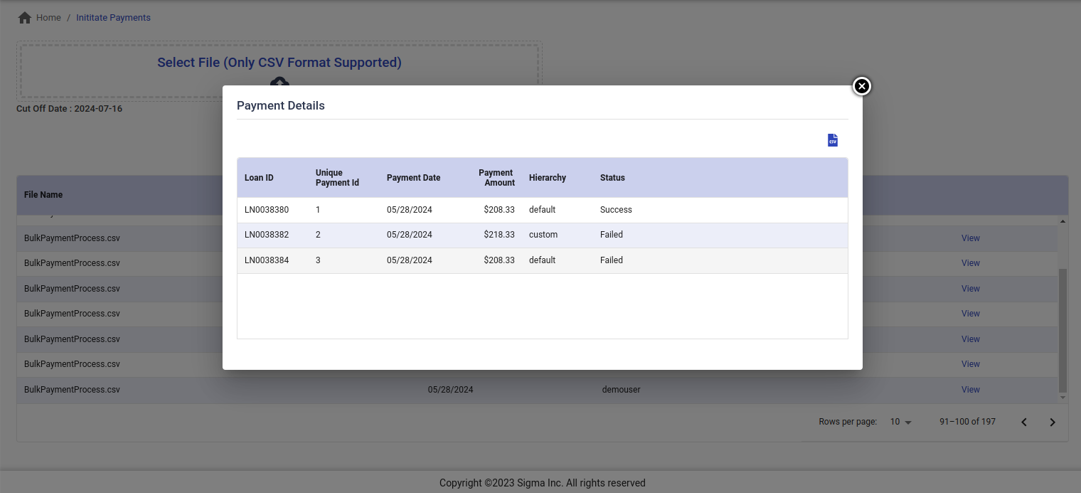
Payment Failures
Each Payment is associated with Loan ID, InternalReferenceNumber and InternalReferenceID. The latter two are system generated and are a unique combination to identify a payment in LF.
If there is a payment failure for any loan, LF expects these to be available in a file on an SFTP. Files can be placed by the tenant or by a payment service provider. Files can be in standard ACH format or in relevant agreed upon format from the service provider. All Files must contain a unique payment identifier, reject reason code and description. This file for failed payment needs to be uploaded to a configured SFTP location. The file will be picked up for parsing at a configured time of the day. The LF system will read the failure file and publish a failure event on such loans that have a failed payment. The payments will be reversed in LMS and such loans can now also be seen in the “Failed Payments” filter.
If there have been subsequent payments, which are marked as successful, then the system will locate the payment, reverse any subsequent payments and fail the relevant payment with exactfailure codes and reasons. Once done the subsequent successful payments will be reapplied on the same loan. As a result, often loans (where APR is >0%) will have an additional interest due, which needs to be paid by the borrower. Automatic reversal of failed payments is presently unavailable on loans where the failed payment belongs to a schedule from a prior version, where the current version is after a modification or restructuring.
-
Manual Payments Needed
In such cases a customer service rep will need to follow up on such loans. If there is repayment on such a loan, before the next payment due date, then Business User will need to manually go to the loan and use the “Make Payment” action, using the appropriate payment hierarchy. The same can also be achieved using the Make Payment API. The API details can be shared on request.
Alternatively, if the Payment via LF Borrower Portal is enabled the Borrower can initiate a payment for the overdue amount. -
Missed Payment/Failed Payment Handling
When a payment is failed, the user is alerted by the respective event in the Inbox. On such a loan, the DPD count will start as soon as the payment fails. Such loan(s) will be housed in the respective DPD filter. Also, the Current Outstanding section in the Economics tab for that loan will be updated. If this is a “Standard” failure which allows us to resubmit the payments to the same account such as a NSF(Insufficient Funds) failure on the payment, then the system will automatically retry the failed payment as per the product parameter set. However, for all other failure codes, the back office user will be given an option to manually submit that payment again by clicking the “Resubmit” button against that payment in the Payment History tab.
If it is an MCA loan, then the repayment schedule will get updated depending upon the configuration set while setting up the MCA product. The configuration will define if the missed payment amount should be added to the next payment schedule or the entire schedule should be shifted by the number of missed payments, or the missed payment amount should be recovered at the end. For Interest-bearing loans with equal installment payments, Additional Interest will be calculated from the date of failure and Interest outstanding will also be updated. For interest-only payment loans, there is no impact in terms of additional interest, unless it is the last balloon payment that failed. Late fees, if configured for the Tenant, will be automatically applied as per the rule set by the Tenant. If needed, the user can also assess fees manually on such loans upon failure of a payment. These fees will get added to the outstanding balance and need to be cleared to be able to pay off the loan completely.
Collection Module
The Collections feature in LendFoundry automatically assigns delinquent loans to collection agents based on predefined queues, eliminating manual loan distribution and ensuring efficient collection management.
Filters/Queues: The Loans are categorized into Filters, based on the delinquency bucket setup requested by the lender. The queues are the same as the filters on the LMS screens such as Good Standing, 30 DPD, 30 + DPD, etc. A loan automatically moves into a queue once it becomes eligible.
Collection Desk: This is an abstract entity which is mapped to a user and can be assigned to loans sequentially using a round-robin method. One Collection Desk can be mapped to only one LMS User. However, one LMS User can be mapped to multiple Collection Desks and one collection desk can be mapped to multiple queues. A collection desk can be reassigned to other users as needed, providing the much needed flexibility for user management.
A collection desk is responsible for driving the collection processes on their assigned delinquent loans.
- When a user logs in they will get a section called “My Collection Queue” – all the loans associated with the specific collection desks mapped to the user will be displayed here.
- In the left menu, user can find an option called “Collections Setup” as shown
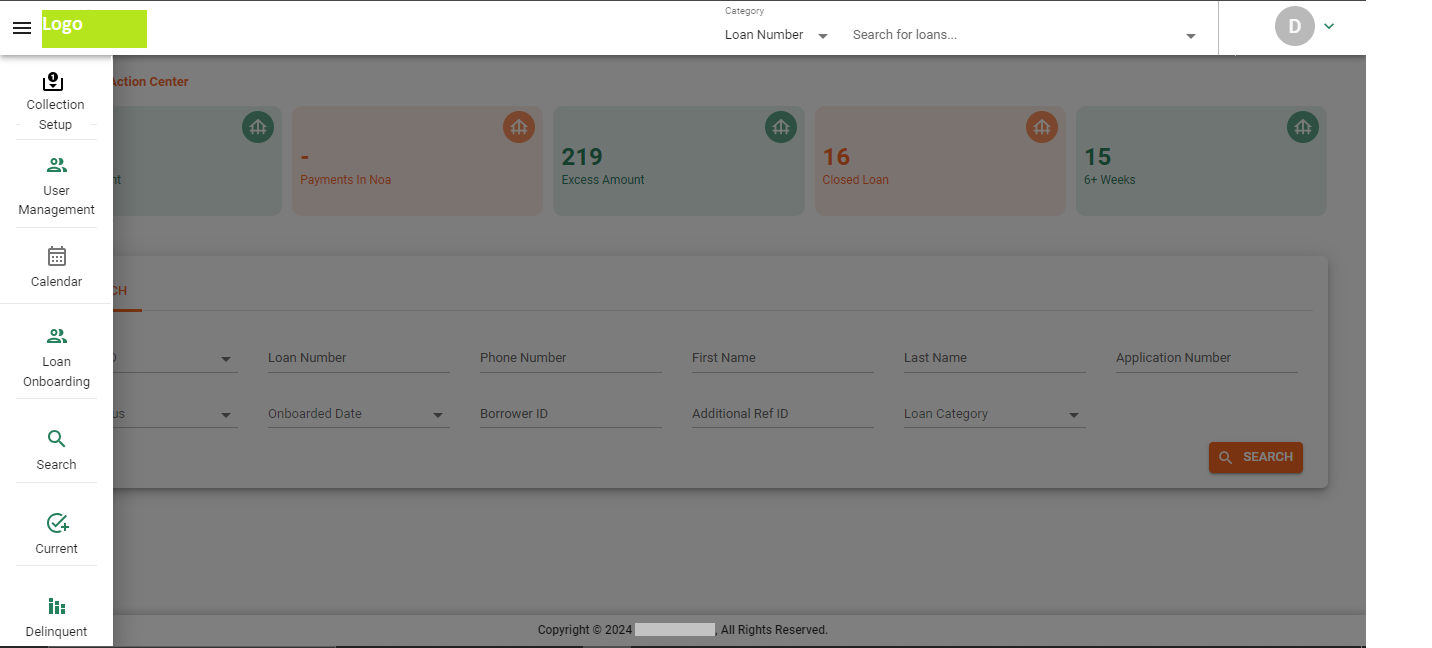
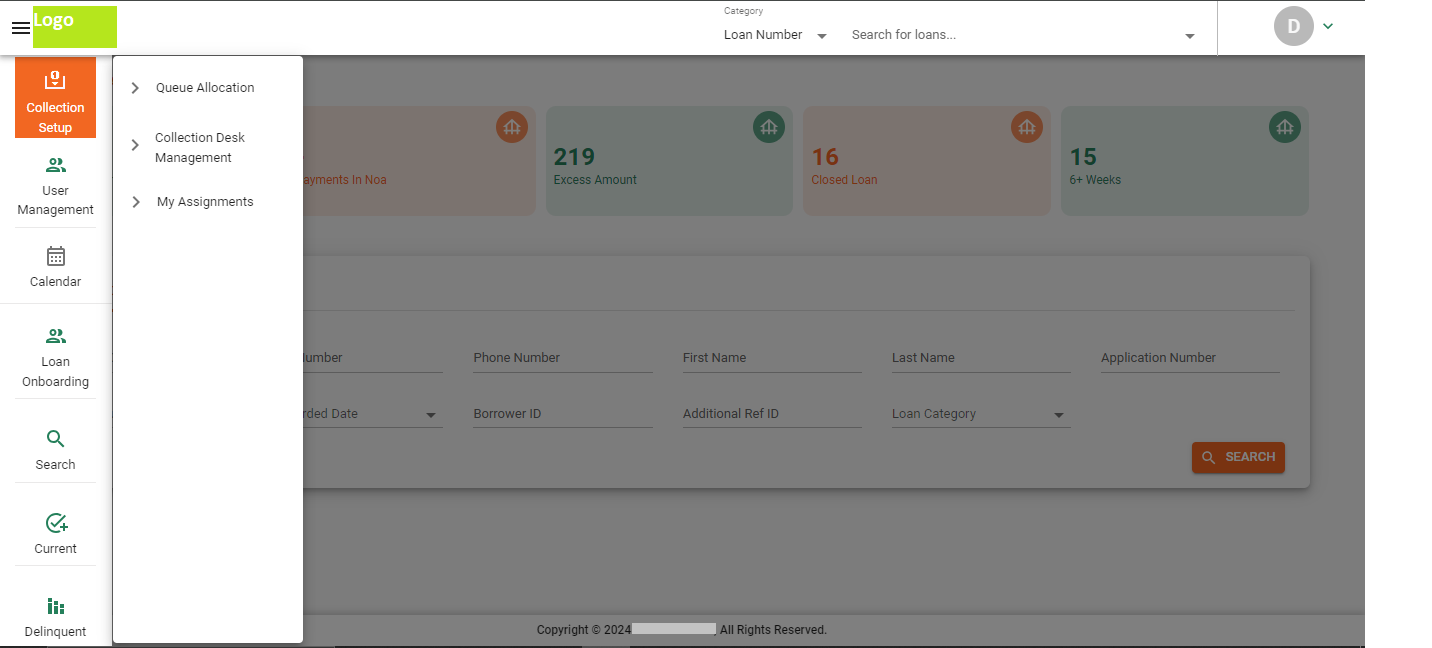
- On Clicking the “Collections Setup” Menu option we can see the following suboptions:
- Queue Allocation
- Collection Desk Management
- My Assignments
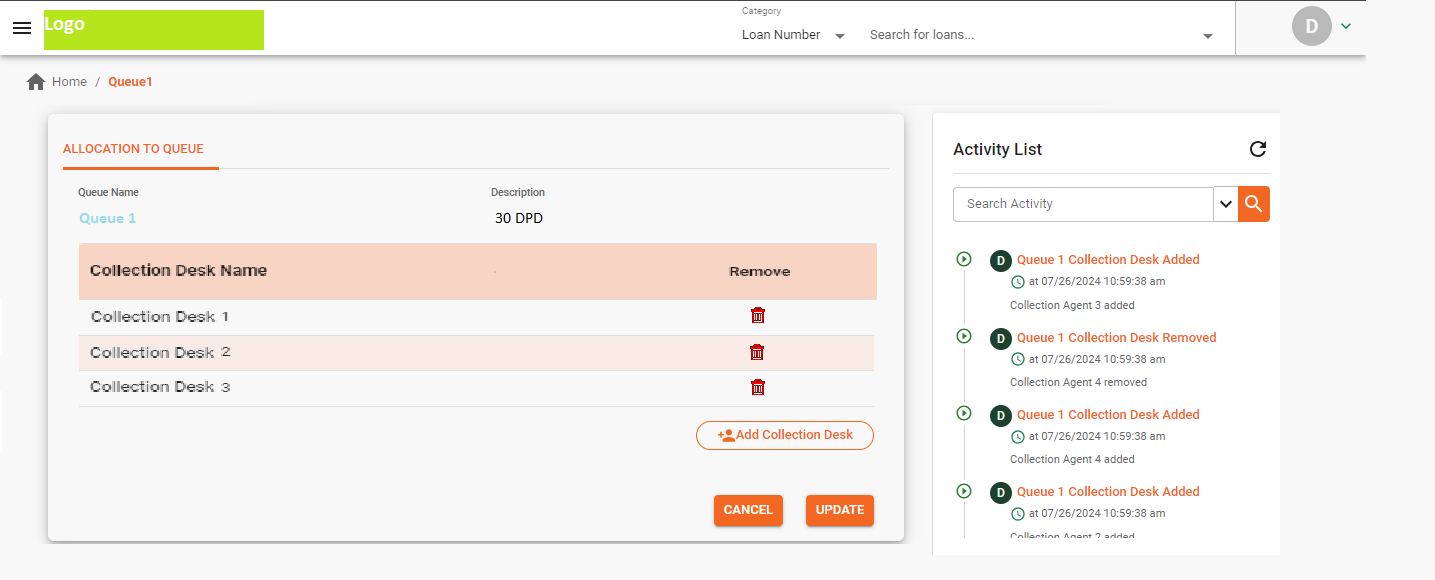
- On selecting the “Queue Allocation” option, we are led to the following screen where the user can see the queue setup, with queue name, description and the assigned collection agents:
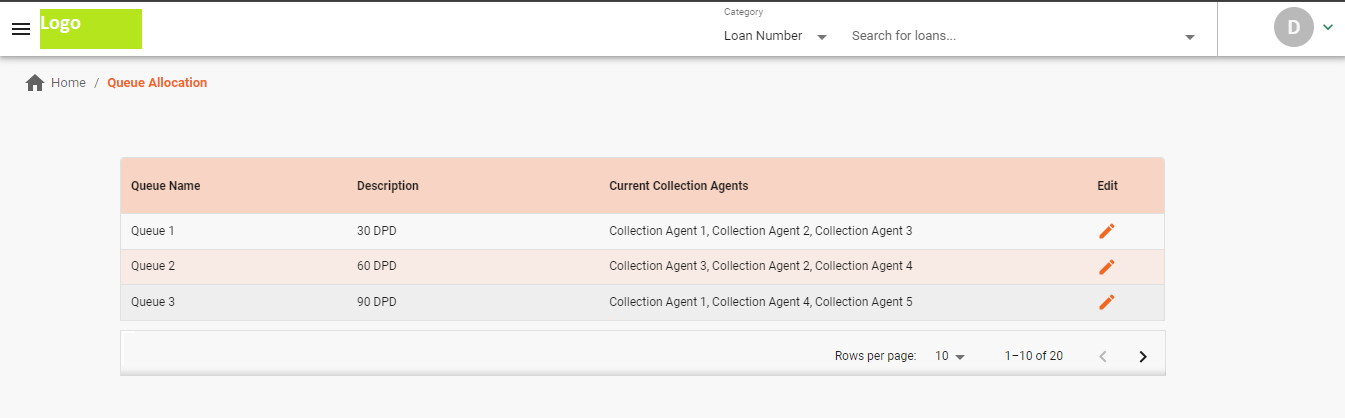
- After clicking on the edit(Pencil icon) button. we can view the queue details, allocate/deallocate Collection Desks to the queue and view the allocation history:
- In the “ Collection Desk Management” option, we land at this page showing all the current allocations. The Collection Desk Name field will be any name that the User wants to have in Add Collection Desk.
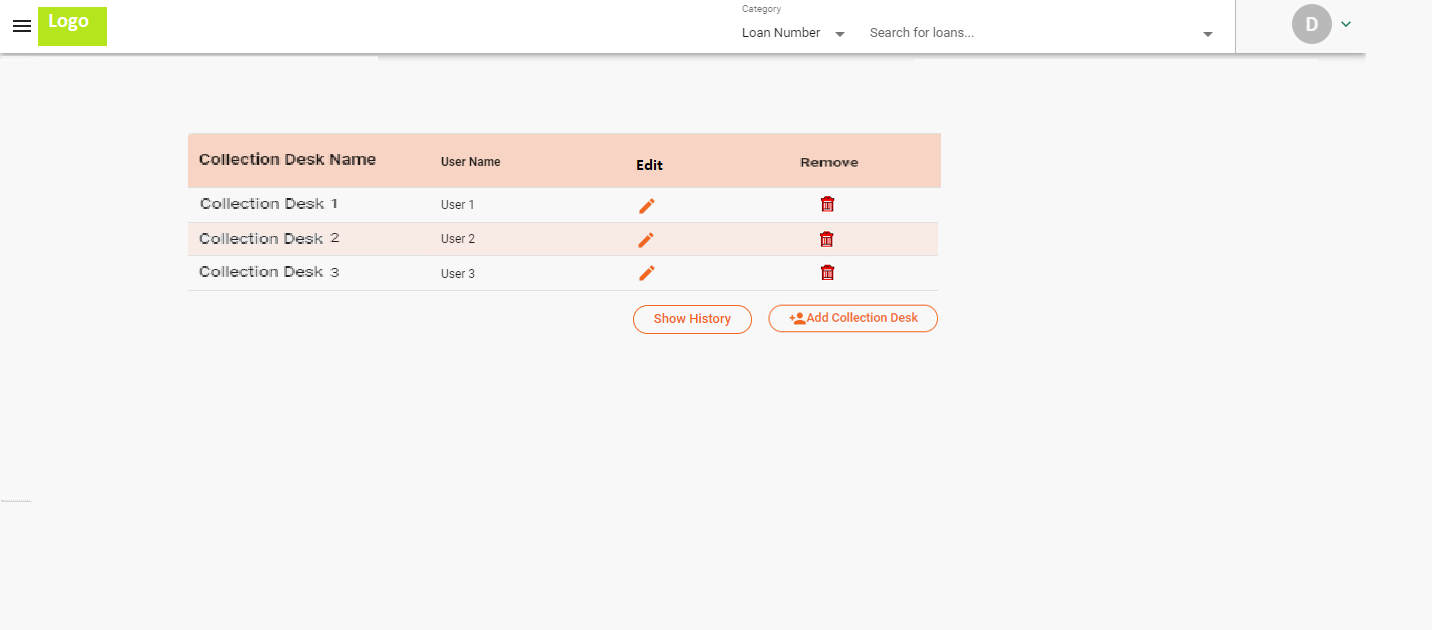
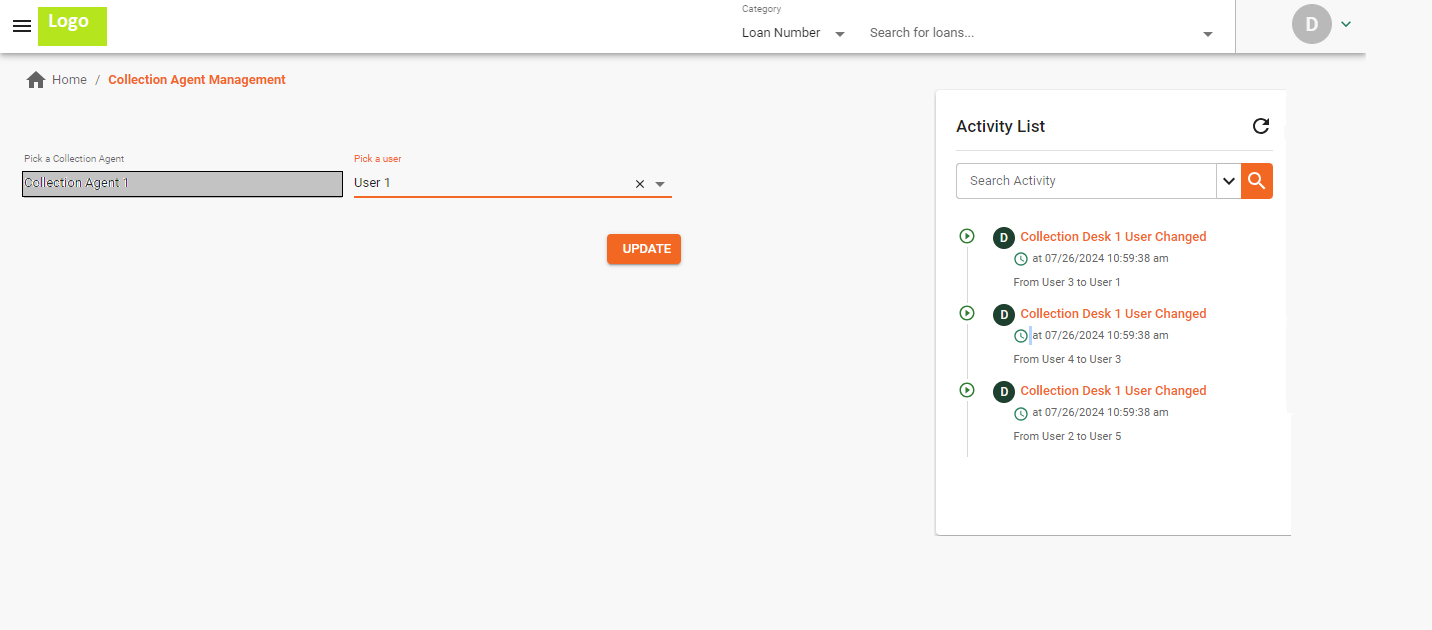
- We can edit the Collection Desk by using the edit button, where we can see the history of the user allocation done to the Collection Desk:
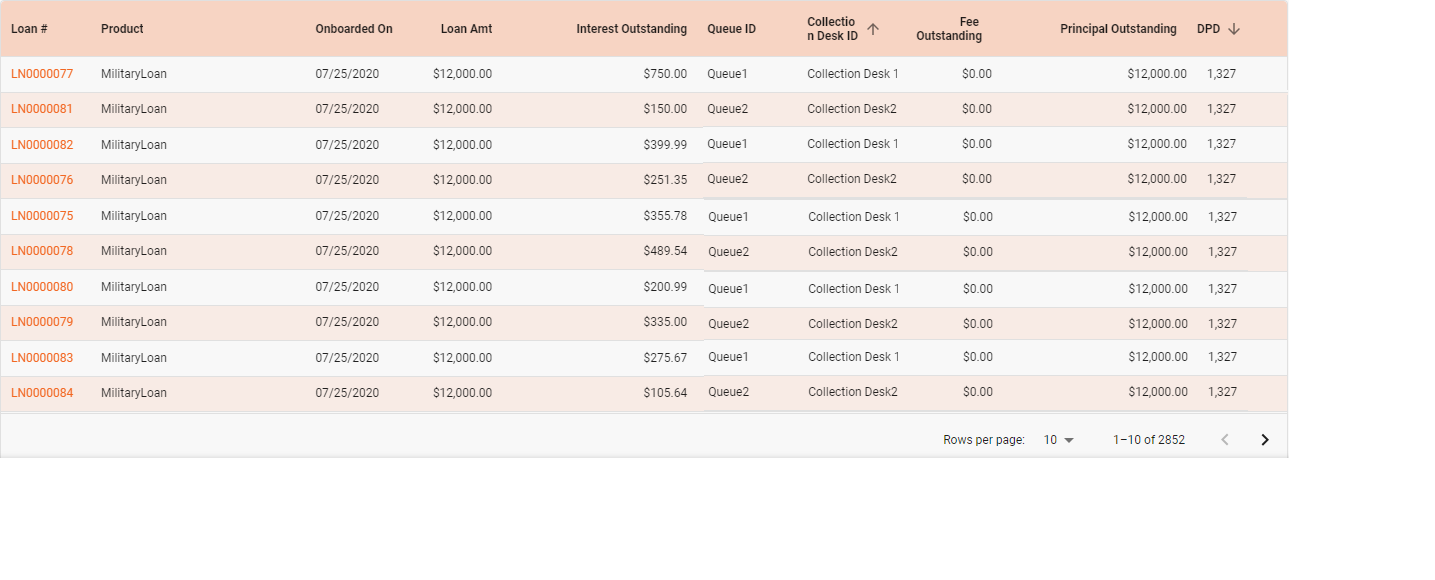
- On selection the my allocation view, user can see all the loans assigned to them, along with Queue and Collection Desk details:
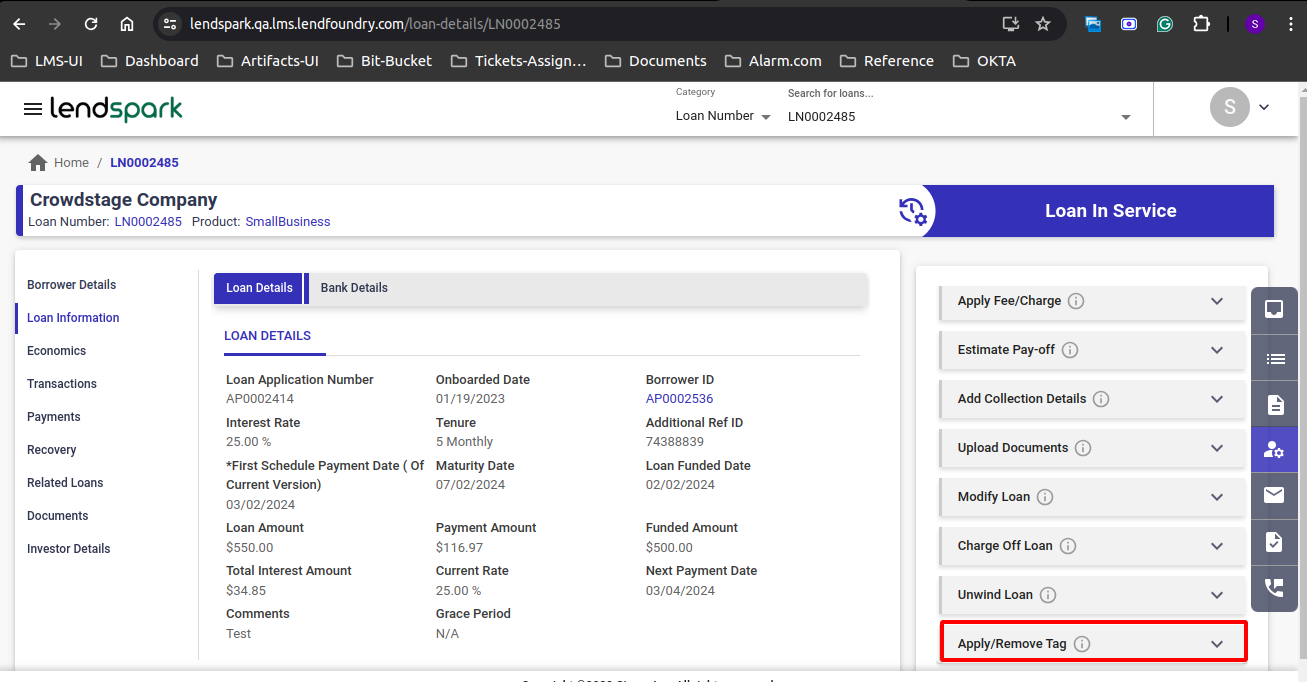
Tagging a loan
The system allows the lenders to tag loans based on specific criteria. These tags can be applied either manually or automatically, depending on rules like Days Past Due (DPD) or First Payment Default, which will be configurable by the tenant.
To support this, we have an action menu,”Apply/Remove Tag” to enable back-office users to apply tags manually. Additionally, the system is also capable of automatically applying or removing tags based on specific events.
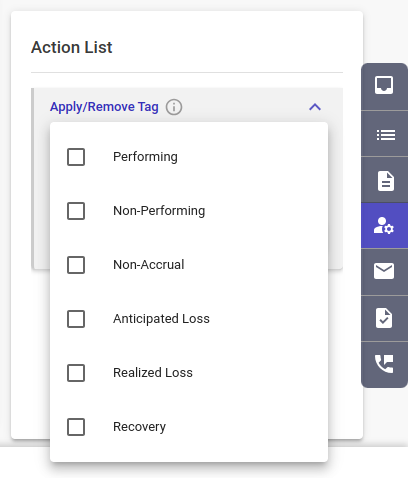
Currently, the following tags are configured in the system:
- Performing
- Non-Performing
- Non-Accrual
- Anticipated Loss
- Realized Loss
- First Payment Default
In the future, we may add new tags as needed based on requirements.
Screenshot of the action menu:
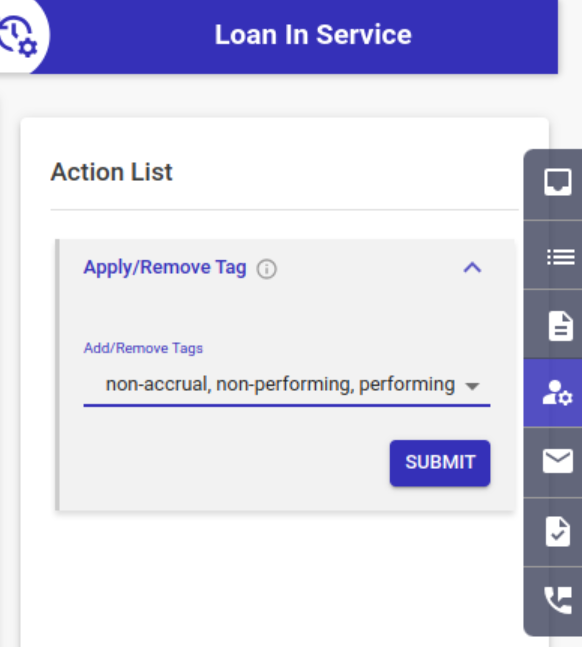
The configured tags appear like below and the user can choose to apply the tag from this list.
In order to remove the tags, the applied tags are shown below with an option to remove them using a cross (x) icon.
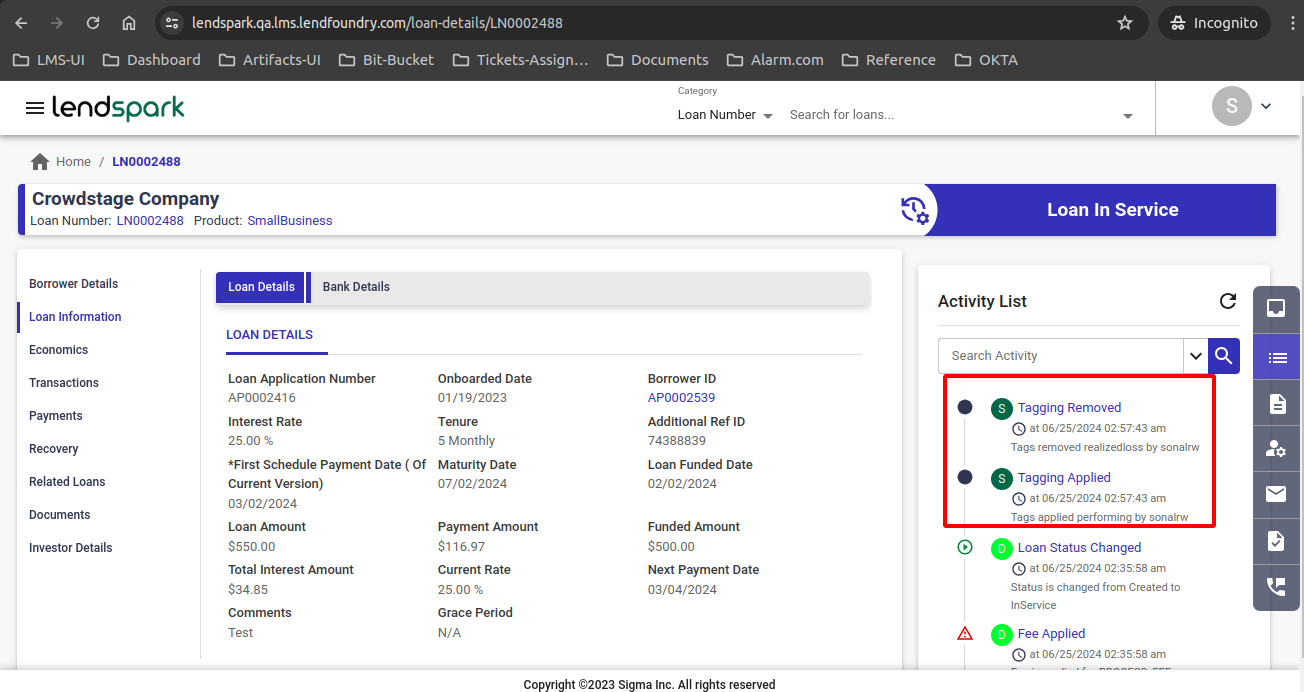
Based on tags application and removal, the corresponding activity is logged in the Activity List
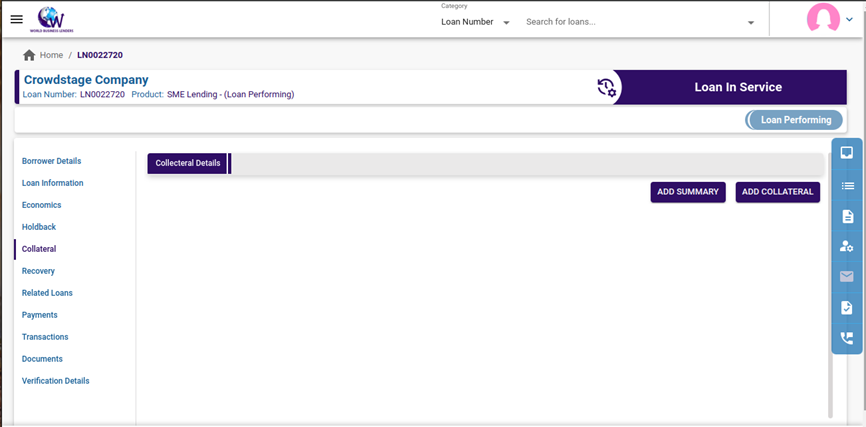
Adding Collateral
Secured loans are generally backed up by Collateral. Collateral can be of any type. In Lendfoundry we support adding a collateral to a loan via API/UI. Adding a collateral via UI is described below using the screenshots.
To add them, navigate to the "Collateral" tab, where you will find the "Add Summary" and “Add Collateral" buttons to add the collateral summary and the collateral details respectively.
Add Summary: When the user clicks the "ADD SUMMARY" button, the below page will open. After updating the required details and submitting, the “Summary” will be added to the Collateral Details.
Edit Summary: Summary can be edited using the edit icon. After making the necessary changes, the user can either submit or close the pop-up. Upon submission, the edited details will be updated in the Collateral Summary Details.
Add Collateral: The user can add collateral details using the "ADD COLLATERAL" button that allows the user to select a category of collateral and add details pertaining to that.
In this "Select Category" section, choose a category to add. Once selected, all fields related to that category will be displayed. Once the required fields are updated and submitted, the added Collateral category will be displayed in the same tab. We can also add collateral of multiple categories to a loan.
Edit Collateral Category:
Each Collateral Category has an edit icon to modify the details. When the user clicks the edit icon, a page as shown below is opened up for editing. After making the necessary changes, the user can either submit or close the pop-up. Upon submission, the edited details will be updated.
Note: The collateral categories and details for each category of collateral are configured and would be discussed with the product team during discovery.
Batch Jobs
Overview
Batch Jobs refer to the automated processing of bulk operations on a high volume of loans in a scheduled manner, typically at predefined intervals such as daily, weekly, or monthly on a specified time. Each task is dedicated to perform a defined activity. These tasks are mostly run during the non-business hours of the client so that the regular operations are not impacted. These jobs or tasks help to streamline operations, optimize resource utilization, and minimize manual intervention. Batch processing is a cornerstone of operational efficiency in the LendFoundry Loan Servicing System, enabling the systematic execution of high-volume, repetitive processes.
Some of the examples of standard LF LMS EOD/BOD tasks are for running accrual, NACHA file creation for repayment/disbursement, Retrying on NSF etc. Additional batch jobs may be incorporated upon request, subject to formal approval and evaluation of technical feasibility and business requirements.
Batch Job Updates and Notification Alerts
The batch jobs within the system are fully automated, ensuring seamless execution without manual intervention. Associated notifications or alerts regarding the status of these jobs, including any updates or errors, can be sent to tenants via Email, Slack, or both. Additionally, all relevant information is readily accessible through the Loan Servicing portal, allowing tenants to quickly and easily access real-time updates and review historical data for Batch Jobs. This ensures efficient monitoring and management of job statuses over time.
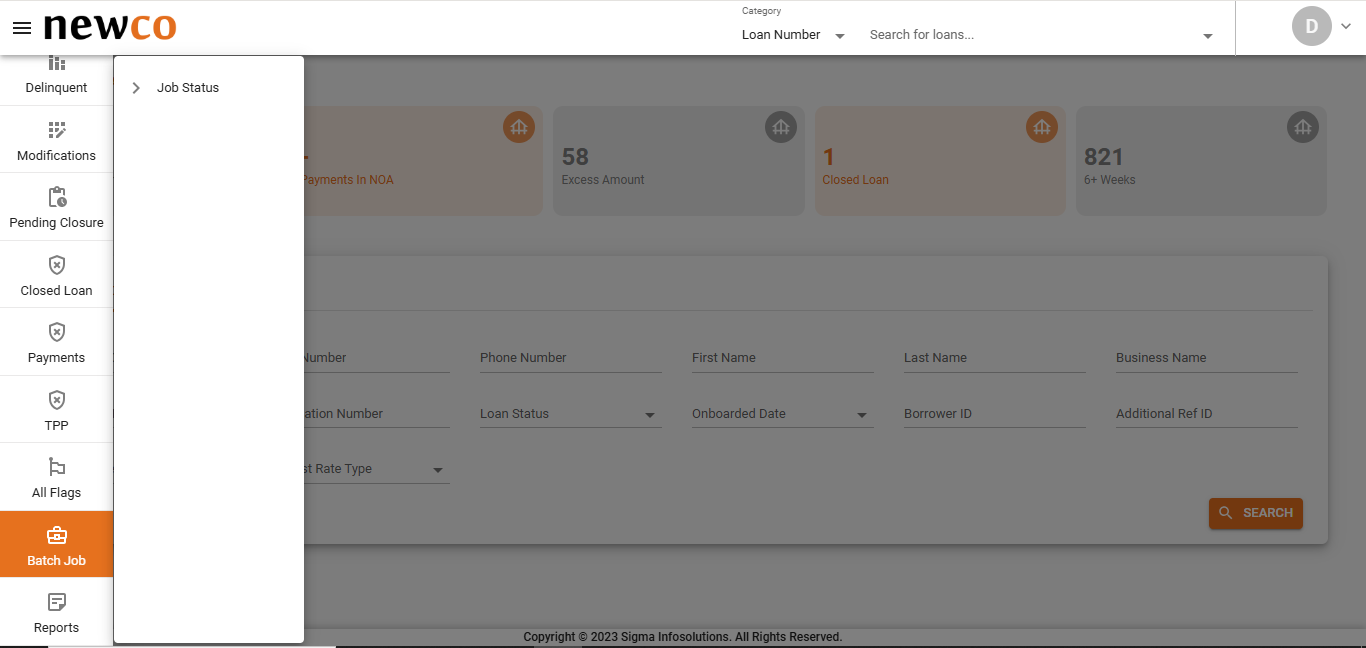
Batch Jobs on the LMS portal.
Once the Backoffice User logs in to the Loan Servicing System, he/she can go to the Left Menu Pane and access the “Job Status” of various “Batch Jobs” configured for them.
Loan Servicing System
The interface allows the option to select a task from a drop-down which lists all the configured tasks for the tenant. The user can select the Date Range for which they want to check the detailed status of the Batch Job.
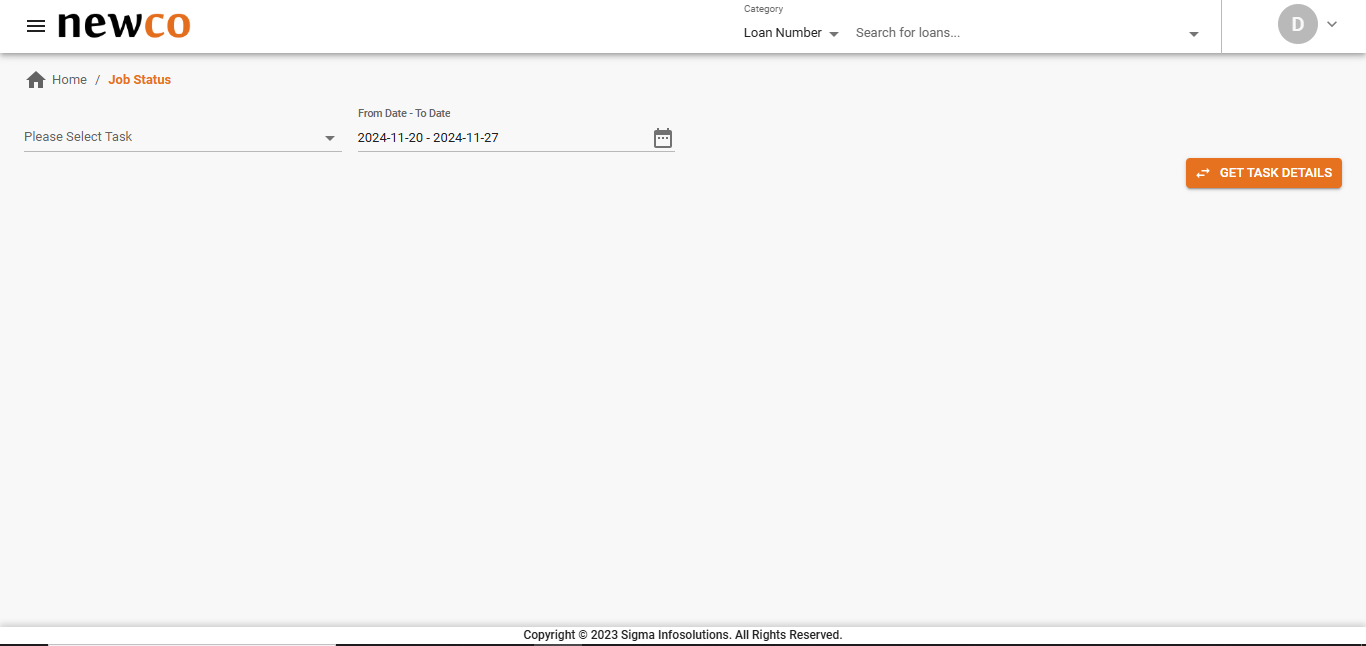
The user clicks on the “Get Task Details” button.
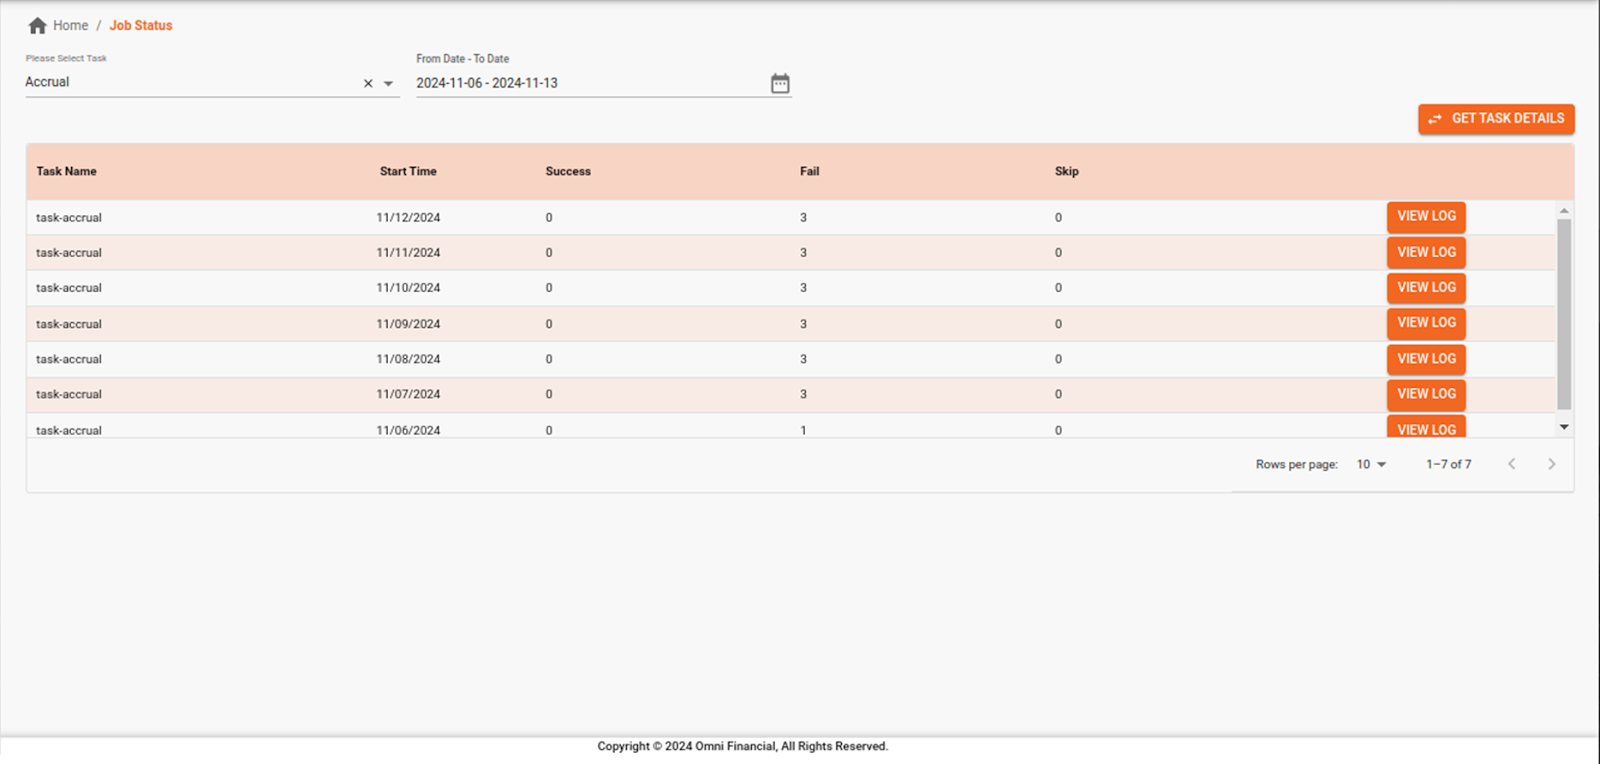
Upon click, the table on the UI displays the following columns: Task Name, Start Time, Success, Fail, Skip, and a View Log button.
- Task Name refers to the task name associated with the batch job.
- Start Time indicates when the batch job was executed.
- The Success, Fail, and Skip columns show the count of loans that were successfully processed by the task, that were not processed successfully by the task or that were skipped by the task respectively.
- The View Log option provides detailed information on loans where the task was skipped or failed, including any errors or handling actions, excluding loans where the task was successfully completed.
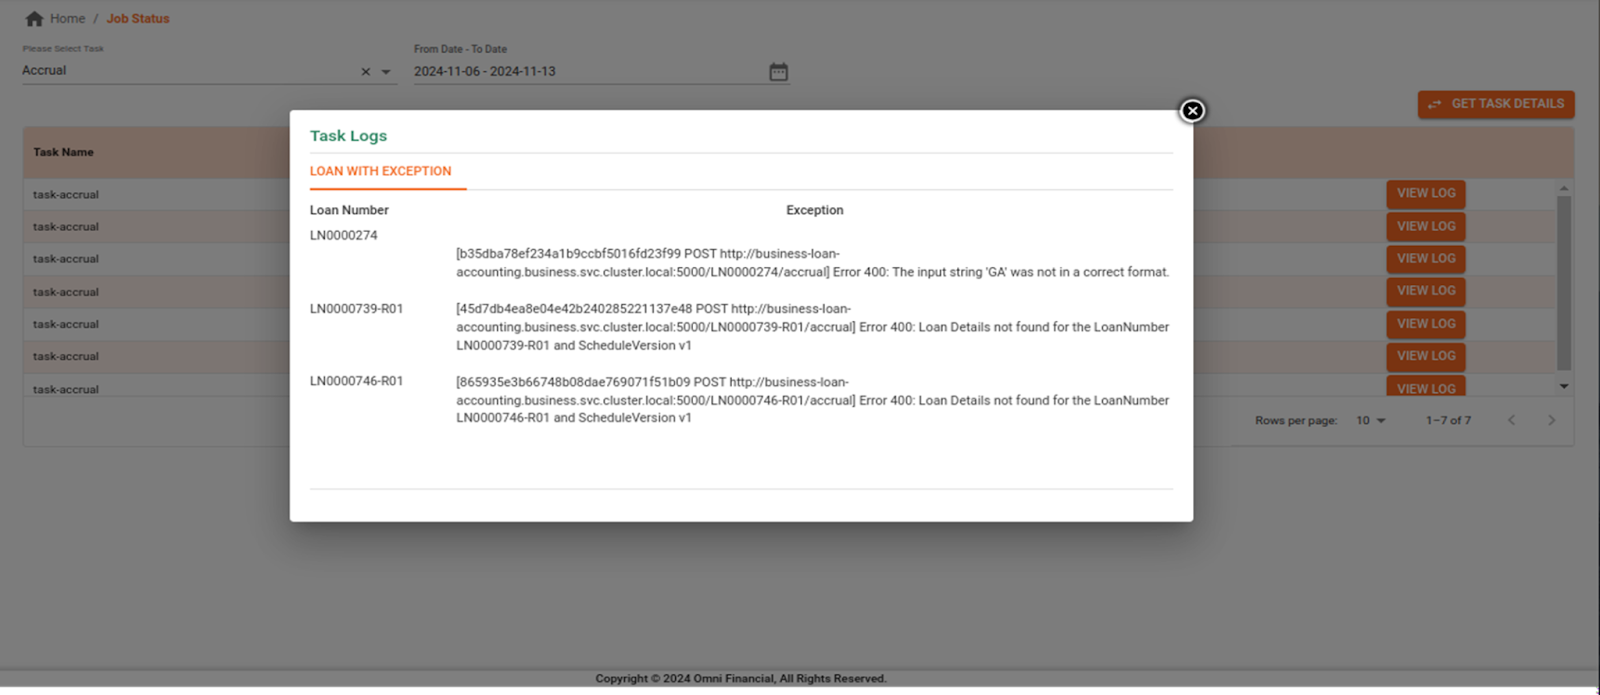
The sample screenshots display the details of an Accrual Batch Job for the specified date range, including the count of loans in each category.
Slack Notification Alerts
A sample update of an Accrual Batch Job received on Slack, generated automatically upon the completion of the Accrual Batch Job task for the particular day.
The standardized UI access for batch job details and Slack alerts is consistently available across all individual batch jobs, ensuring uniformity in how job statuses, updates, and notifications are presented. This includes automated Slack alerts for each batch job, with updates that can be filtered for detailed information directly from the UI, providing a consistent user experience for monitoring job execution and outcomes.